
Struggling to choose the right hole-making process for your engineering project? This guide eliminates the guesswork. We’ll show you exactly when to use drilling, reaming, boring, or honing to meet your precision and cost targets.
| Process | Primary Use | Key Feature |
|---|---|---|
| Drilling | Creates new holes | High speed, low precision |
| Boring | Enlarges existing holes | Corrects hole position/straightness |
| Reaming | Slightly enlarges holes | Improves size tolerance and finish |
| Honing | Finishes existing holes | Perfects surface finish and geometry |
Now that you have the basics, dive into our detailed analysis. We’ll cover critical decision points and share a flowchart that will make you a hole-making expert.
A Quick Look at Core Capabilities
Before we dive deep, let’s establish a clear baseline. Think of these four processes as a set of specialized tools in your workshop. You wouldn’t use a sledgehammer to hang a picture frame, right? The same logic applies here.
Each process has a distinct role in the journey from a rough opening to a perfect, high-performance hole.
- First up is Drilling, the workhorse of hole-making. Its primary job is straightforward: to create a hole where one didn’t exist before. It’s fast, efficient, and the starting point for almost any hole. You can be confident that precision hole-making starts with drilling.
- Next, we have Boring. Unlike drilling, boring works on an existing hole. Its main purpose is to enlarge the hole to a precise diameter and, most importantly, to correct any errors in its location or straightness. It’s the only process that can realign a hole’s true centerline.
- Then comes Reaming, a light finishing process. After a hole has been drilled or bored, a reamer is used to make a small, precise improvement to the hole’s diameter and give it a smoother surface finish. It follows the existing path of the hole without changing its location.
- Finally, there’s Honing, the ultimate finishing touch. This abrasive process is all about achieving superior surface finish and perfecting the hole’s geometry, such as its roundness and cylindricity. It’s the go-to method for high-performance applications where surface quality is paramount.
The Decision Quick-Reference Table
To make sense of it all at a glance, here’s a table that summarizes the key performance indicators for each process. Keep this handy; it’s your first step in narrowing down the options.
| Metric | Drilling | Boring | Reaming | Honing |
|---|---|---|---|---|
| Achievable IT Tolerance Grade | IT10 – IT13 | IT6 – IT9 | IT6 – IT8 | IT5 – IT7 |
| Achievable Surface Finish Ra (μm) | 3.2 – 12.5 | 0.4 – 6.3 | 0.8 – 3.2 | 0.05 – 0.8 |
| Geometric Correction Ability | Poor | Excellent | Poor | Excellent (Form only) |
| Material Removal Rate (MRR) | Very High | Medium – High | Low | Very Low |
| Relative Cost (Per Piece) | Low | Medium – High | Medium | Very High |
| Core Function | Creates the initial hole | Enlarges & corrects hole position | Improves size & finish | Perfects surface & geometry |
Key Decision Points for Engineers
That table gives you the big picture, but successful engineering lives in the details. Now, let’s break down the critical decision points that separate a functional part from a flawless one.
This is where we move beyond what these processes do to how they solve your specific problems.
Tolerance and Dimensional Control
Let’s talk about precision. When your design calls for a specific fit, clearance, or interference, you’re operating in the world of tolerances, often defined by IT (International Tolerance) grades. A lower IT grade means a tighter, more precise tolerance.
Your choice of process has a direct impact on the IT grade you can reliably and economically achieve.
- Drilling (IT10-IT13): A standard drill will give you a hole, but it won’t be a highly accurate one. Think of drilling as creating the rough outline. It’s perfect for clearance holes for standard bolts or as a starting point for a more precise process. You should never rely on drilling alone for parts that require a specific fit.
- Reaming (IT6-IT8): This is where you enter the world of precision fits. Reaming is excellent for achieving a target diameter with high repeatability. If you need a hole for a dowel pin or a press-fit bearing and the initial hole position is already correct, reaming is an efficient and cost-effective choice.
- Boring (IT6-IT9): Boring offers a similar tolerance range to reaming but with a crucial difference we’ll discuss later. For achieving a precise diameter, especially in larger holes or situations where you need to fine-tune a specific size, boring provides excellent control.
- Honing (IT5-IT7): When you need to hold the tightest tolerances on diameter, roundness, and straightness over a long bore, honing is the answer. This process is reserved for the most demanding applications where even microns of deviation can impact performance.
Surface Quality and Performance
A hole’s performance isn’t just about its size; it’s also about the texture of its walls. Surface finish, typically measured in Ra (Roughness Average), has a huge impact on friction, sealing ability, and the wear life of a component.
A rough surface can act like a file, quickly wearing down seals or bearings. Conversely, a surface that’s too smooth might not hold lubricant effectively.
- Drilling (Ra 3.2 – 12.5 μm): This process leaves behind a relatively rough surface with visible tool marks. It’s suitable for applications where surface texture isn’t a primary concern.
- Boring & Reaming (Ra 0.4 – 3.2 μm): Both of these processes will give you a major upgrade in surface finish, creating a smooth, bright surface that is ideal for many industrial applications, including press fits and general-purpose bearing bores.
- Honing (Ra 0.05 – 0.8 μm): Honing is in a class of its own, capable of producing an almost mirror-like finish. But here’s a crucial insight: with honing, the goal isn’t just smoothness, it’s about creating a functional surface.
This is where we need to look beyond a simple Ra value.
As Phil Hanna, a Senior Applications Engineer at honing leader Sunnen Products Company, explains, “The goal of honing is not just to achieve a fine surface finish; it is to create a functional surface with a specific cross-hatch pattern. This pattern acts as a reservoir for lubrication, which is absolutely essential for reducing friction and wear in high-performance applications like engine cylinders and hydraulic components.”
Think about that. The microscopic valleys in the honed cross-hatch pattern hold oil, ensuring constant lubrication for pistons, seals, or shafts. In this context, the surface isn’t just a passive boundary; it’s an active engineering feature. This is a level of control that no other hole-making process can offer.
Need Perfect Holes, Every Time?
Whether you need the initial speed of drilling or the ultimate precision of honing, our CNC services deliver. Let our experts ensure your parts meet the exact tolerance and finish your design demands.
The Critical Difference: Error Correction vs. Error Inheritance
This is, without a doubt, the most important concept you need to grasp when choosing between these processes. It’s a distinction that can mean the difference between a successful project and a batch of expensive scrap.
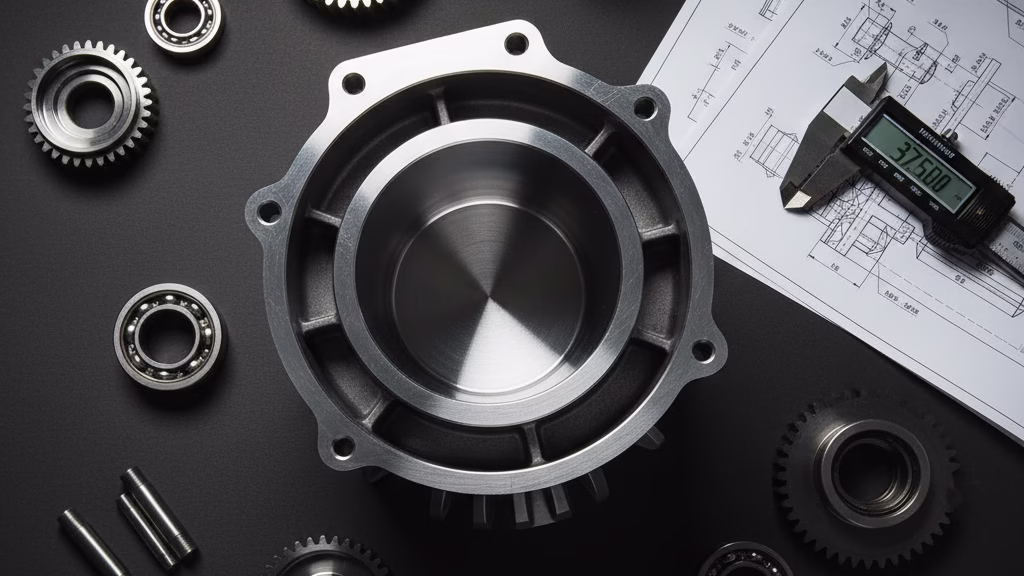
Let me share a quick story. A client of ours was manufacturing a high-precision gearbox housing. The design required three parallel bores for the planet gears. The initial process was to drill the holes and then ream them to the final IT7 tolerance. On paper, it was a sound, cost-effective plan.
When the first batch came back from inspection, the report was perfect: every hole’s diameter and roundness were well within spec. But during assembly, disaster struck. The gears wouldn’t mesh properly and made a terrible grinding noise. The entire batch was at risk.
So, what went wrong?
The team had fallen into a classic trap. During the initial drilling, the drill had wandered ever so slightly, creating a tiny, almost imperceptible deviation in the true position of the holes.
And here’s the critical lesson: reaming is an error inheritor. A reamer will meticulously follow the path of the existing hole. It beautifully refined the hole’s diameter and surface finish, but it did absolutely nothing to fix the underlying positional error.
This is where boring shines. Boring is an error corrector.
As Matthieu Kennec’h, Global Product Manager for Boring at the industry-leading tool manufacturer Sandvik Coromant, states, “Unlike reaming, which will follow the path of the existing hole, boring is the only process that can actually correct the hole’s position and improve its straightness. It generates a new, true centerline.”
By switching their process to drill, bore, and then lightly finish, our client was able to use the boring operation to re-establish the perfect parallel alignment of the three holes, saving the project.
Remember this rule:
- If your hole’s location or straightness is critical, you need a process that can correct errors. That process is boring.
- If your hole’s location is already perfect and you simply need to improve its size and finish, a process that inherits the location, like reaming, is the right tool for the job.
A Practical Decision-Making Framework

Alright, we’ve covered the theory. Now, let’s turn that knowledge into a practical, repeatable process you can use on your next project. This section is all about providing you with the tools to move from confusion to a clear, defensible decision.
Your Go-To Tool: The Process Selection Flowchart
Engineers love a good flowchart, and for good reason. It turns a complex set of variables into a simple, logical path. To make your life easier, we’ve distilled the core logic of this article into a decision-making flowchart. Think of it as your interactive guide.
The next time you’re specifying a hole, walk through these questions:
- Start Here: Do you need to create a new hole or improve an existing one?
- New Hole: Your journey begins with Drilling. Proceed to the next question.
- The Critical Question: Does the hole’s position, straightness, or alignment need to be corrected or established with high precision?
- Yes: Your only reliable choice is Boring. This becomes your primary process before any final finishing.
- No (Position is already acceptable): Proceed to the next question.
- Refining the Hole: What is your primary goal?
- Goal A: Improve dimensional accuracy (tolerance) and surface finish with minimal material removal. Choose Reaming.
- Goal B: Achieve the absolute best surface finish, roundness, and cylindricity, often for high-performance applications. Choose Honing as your final step.
This simple flowchart cuts through the noise and forces you to address the most critical factor first: the difference between error correction and error inheritance.
A Total Cost of Ownership (TCO) Perspective
A savvy engineer knows that the cheapest per-piece price isn’t always the cheapest total cost. Making a truly smart decision requires looking at the bigger financial picture. When you’re comparing these processes, consider these factors:
- Machine & Capital Investment: Do you have a honing machine in-house? If not, outsourcing adds cost, lead time, and logistical complexity. The capital investment for specialized honing equipment is significant compared to a standard CNC mill capable of boring.
- Tooling Costs: A standard drill bit is inexpensive. A precision, adjustable boring head is more costly. Custom honing tools can be even more so. You must factor in not just the initial cost, but the tool’s lifespan and replacement frequency.
- Cycle Time: Drilling is fast. Honing is slow. The time it takes to perform each operation has a direct impact on your machine’s hourly rate and overall throughput. Sometimes, a slightly more expensive but faster process can lead to a lower total cost on high-volume production runs.
- The Cost of Quality (or Lack Thereof): What is the cost of a scrapped part? The higher initial cost of a process like boring might be easily justified if it eliminates the risk of positional errors that would cause entire batches to be rejected, as we saw in the gearbox case study.
By adopting a total cost of ownership (TCO) mindset, your process decisions become not just technically sound, but also commercially astute. You’ll be able to justify your choices not just to other engineers, but to project managers and the finance department as well.
Common Defects and Solutions
Even with the right process, things can go wrong. Manufacturing is a world of variables.
To help you move from firefighting to prevention, here is a quick-reference guide to some of the most common defects you might encounter, along with their likely causes and solutions. Think of this as your troubleshooting checklist.
| Process | Common Defect | Potential Causes | Recommended Solution |
|---|---|---|---|
| Drilling | Oversized Hole | – Worn or improperly sharpened drill bit. – Excessive cutting speed. |
– Replace or regrind the drill bit. – Reduce spindle speed. |
| Hole Position Error | – Drill walking on the surface. – Insufficient workpiece clamping. |
– Use a center drill or spot drill first. – Check and improve the fixture. |
|
| Boring | Vibration (Chatter) | – Tool overhang (L/D ratio) is too long. – Incorrect cutting parameters (speed/feed). |
– Use the shortest, most rigid boring bar possible. – Adjust speed/feed. |
| Tapered Hole | – Tool deflection. – Worn or chipped cutting insert. |
– Take lighter finishing passes. – Rotate or replace the insert. |
|
| Reaming | Surface Scratches | – Poor chip evacuation. – Inadequate lubrication. |
– Use a reamer with helical flutes. – Ensure ample, clean coolant flow. |
| Chatter Marks | – Incorrect feed rate (too slow). – Misalignment between hole and reamer. |
– Increase the feed rate. – Check machine and tool alignment. |
|
| Honing | Uneven Cross-hatch | – Incorrect ratio of rotation to stroke speed. | – Adjust machine parameters to achieve the desired angle. |
| Barrel or Taper Shape | – Incorrect stroke length (not over-stroking ends). | – Adjust the stroke so the abrasive stones travel slightly past the ends of the bore. |
Keep this guide handy. By understanding what can go wrong and why, you’re better equipped to prevent these issues from happening in the first place, saving valuable time and materials.
Industry Perspectives That Change Your Mindset
The technical manuals give you the data, but wisdom comes from understanding the context in which that data is applied. The best engineers don’t just think about the part; they think about the entire system, from supply chain to market competition.
Let’s explore a few insights that can elevate your decision-making from a simple technical choice to a strategic business move.
Your Process Choice Is a Supply Chain Strategy
When you specify a process on a drawing, you’re doing more than calling out a manufacturing step; you’re making a supply chain decision. While most machine shops have drilling and boring capabilities, a high-precision honing machine is a far more specialized piece of equipment.
Before you specify a process like honing, you must ask: can we do this in-house? If not, do we have a qualified, reliable vendor who can? What are their costs and lead times? The choice between keeping a process internal versus outsourcing it is a strategic one.
Outsourcing can give you access to world-class expertise and equipment without the capital investment, but it can also introduce risks related to quality control, lead time, and intellectual property.
A senior engineer instinctively weighs these factors. They practice a form of “Design for Supply Chain,” ensuring that their design is not only manufacturable but also sustainable within the company’s operational and strategic framework.
How New Technology Is Blurring the Lines
The textbook capabilities of these processes are not static. Technology is constantly evolving, and what was considered a limitation yesterday might be a solved problem today. For example, traditional boring was often limited in deep holes (where the length-to-diameter ratio is high) due to the risk of vibration, or “chatter,” which ruins accuracy and surface finish.
However, modern tooling, such as actively dampened boring bars (like Sandvik Coromant’s Silent Tools™), has dramatically pushed these limits. These advanced tools allow for accurate boring in holes that are much deeper than previously possible.
In some cases, a single, precise boring pass with one of these tools can achieve a result that might have required a secondary finishing process in the past.
Similarly, advanced CNC machining algorithms can now use milling tools to create highly accurate holes with excellent finishes, further blurring the lines between traditional processes and offering new, more efficient ways to get the job done.
Don’t let outdated assumptions limit your design. The next time you face a challenging hole-making problem, a conversation with a top-tier tooling supplier could reveal a solution that saves you an entire manufacturing step.
Conclusion: Your Final Decision and Next Steps
So, where does that leave us? We’ve journeyed from the basics of drilling, boring, reaming, and honing to the nuanced, strategic thinking that separates good engineers from great ones.
The next time you face a blank space on a drawing where a hole needs to be, you’ll have a clear process for filling it in with confidence.
Let’s distill it all down to a simple, powerful decision-making mantra:
First, ask about the hole’s position. Then, ask about its tolerance. Next, consider the surface finish. Finally, balance the total cost.
By following this logical sequence, you will consistently land on the right process for the job. You’ll avoid costly mistakes, like using a reamer to fix a positional error, and you’ll be able to justify your decisions with both technical data and sound business logic.
This guide was designed to be your go-to resource for choosing the right hole-making process, helping you navigate the critical trade-offs between drilling vs. boring for accuracy and reaming vs. honing for the perfect finish.
What’s Your Challenge?
Now, it’s your turn. Every engineer has a story about a challenging hole-making project. What’s yours?
And if you’re currently facing a precision hole-making problem that seems particularly tough, don’t hesitate to reach out. Contact our application engineers today, and let us help you find the optimal, most cost-effective solution for your specific needs.
References & Notes
[1] Functional Surface: A term used to describe a surface engineered not just for smoothness (low Ra value) but for a specific performance characteristic. In the case of honing, the cross-hatch pattern is designed to retain lubricant, which is critical for the lifespan and performance of components like hydraulic cylinders and engine bores.
[2] IT Tolerance Grades: The International Tolerance grades, defined in ISO 286, provide a standardized system for specifying the allowed dimensional variation for a part. A lower number (e.g., IT5) indicates a tighter, more precise tolerance than a higher number (e.g., IT10).


