Stop common knurling failures before they happen. This DFM-focused guide details the critical knurling types, applications, and best practices that mechanical engineers must know. Learn to specify correctly, choose the right process (Form vs. Cut), and prevent costly manufacturing scrap.
Knurling best practices involve selecting the right type and process for the application. Use Diamond Knurls (Type AC/AD) for functional grip and Straight Knurls (Type AA) for press-fit applications. The best practice is to choose Cut Knurling for hard (>35 HRC) or thin-walled parts, and Form Knurling only for high-volume, soft materials.
The key to success, however, lies in the specific formulas and callouts you put on the drawing. Read on to see the exact ASME Y14.5 callouts and calculations that prevent 90% of common manufacturing failures.
The Core Decision: Form vs. Cut Knurling

When it comes to knurling, the first major decision you make is the manufacturing process: Form Knurling or Cut Knurling. Most engineers are taught a simple, but dangerously misleading, rule: “Form knurling is fast and cheap; cut knurling is slow and expensive.”
This is a critical cognitive trap.
That logic only calculates the machining time per part. It completely ignores the Total Cost of Quality (TCOQ) and the massive project risks you, the engineer, are taking on.
Form knurling (or displacement knurling) is a cold-forming process. It uses immense radial pressure—sometimes thousands of pounds—to displace material and form the teeth. This makes it highly sensitive to setup and material variations.
We call it “setup gambling” because the blank diameter must be controlled to extreme tolerances (often ±0.0005″). If your material hardness is slightly inconsistent or the setup is off by a fraction, you can easily scrap the first 100 parts.
Cut knurling, on the other hand, is a precision machining process, just like cutting a thread. It uses a cutter to remove material, placing almost zero radial stress on the part. It’s not a gamble; it’s a 100% predictable, CNC-controlled path. The first part will be identical to the 1000th.
Your Process Decision Tree
So, how do you choose? Don’t start with cost. Start with these questions.
- Is my material hardness over 35 HRC?
- Yes: Stop. You must use Cut Knurling. Trying to form-knurl hard materials (like stainless steel or tool steel) will cause flaking and destroy the tooling.
- No: Continue to question 2.
- Is this a thin-walled part (e.g., wall < 2mm)?
- Yes: You must use Cut Knurling. The radial force from form knurling will deform or even collapse the part.
- No: Continue to question 3.
- Is this a high-value part, or is the knurl adjacent to a critical tolerance?
- Yes: You should strongly prefer Cut Knurling. It provides “process insurance.” It won’t affect adjacent surfaces and eliminates the scrap risk that would be catastrophic on a high-value component.
- No: If it’s a simple, low-cost, high-volume part in a soft material (like an aluminum knob), Form Knurling is a viable option.
We saw this firsthand with a medical device client. Their design specified a diamond knurl on a thin-walled (0.75mm) 316L stainless steel tube for a press-fit.
Their first supplier defaulted to form knurling and scrapped 100% of the parts by crushing the tubes. We switched the process to cut knurling, which completely protected the part’s integrity and solved the manufacturing crisis.
This strategic choice is far more important than a few cents saved on cycle time.
Knurl Types and Applications: Ensuring 100% Functional Success
Choosing the right knurling process (Form vs. Cut) is half the battle. The other half is choosing the right pattern for the job. Your choice here directly determines if the part will function as intended.
The most critical distinction to make is: Am I designing for grip or for a press-fit?
For Functional Grip: Diamond Knurl (Type AC/AD)
This is the one you see most often. For a handle, a thumb screw, or any part that needs to be manually gripped (especially in oily or wet conditions), a Diamond Knurl (Type AC/AD) is the gold standard.
The 90° diamond pattern provides multi-directional friction against a user’s hand or fingers. For most general-purpose tools and knobs, a 96 DP (Diametral Pitch) provides an excellent balance of aggressive grip and user comfort. For finer, more ergonomic applications, you might see a 128 DP.
For Press-Fits: Straight Knurl (Type AA) is The Only Choice
Here is one of the most common and costly errors we see engineers make: Never use a diamond knurl for a press-fit application.
Let’s go back to our medical device client. Their first design failed not just because of the process (form knurling on a thin wall), but also because of the pattern.
They had specified a diamond knurl to press a PEEK handle onto the 316L tube.
Here’s what happened: The sharp diamond points acted like a “cheese grater,” scraping and shaving the PEEK material as it was pressed on. This created plastic debris (a critical failure in a medical device) and, because it removed material instead of gripping it, the pull-out force was almost zero.
The solution was to switch to a Type AA (Straight) Knurl.
A straight knurl’s teeth act like fins or “barbs.” When pressed into a softer material (like plastic or even a softer metal), it forces the material to flow and deform around the teeth. This creates a powerful mechanical lock and maximizes the pull-out force.
Handle Hard-to-Machine Materials With Confidence
Whether it’s 316L Stainless, PEEK, or Titanium, your design deserves a partner who understands the process. Zenithin specializes in high-precision machining of complex parts.
Knurl Application Quick-Select Chart
Use this chart to select the right pattern and pitch for your specific function.
| Application Scenario | Recommended Pattern | Recommended Pitch (DP) | Key Design Consideration |
|---|---|---|---|
| Functional Grip (Tools, Handles) | Diamond (Type AC/AD) | 96 DP (Standard) | Balance of grip and user comfort. |
| Press-Fit (into Plastic/PEEK) | Straight (Type AA) | 160 DP (Fine) | CRITICAL: Prevents scraping and maximizes pull-out force. |
| Press-Fit (into Metal) | Straight (Type AA) | 128 DP (Medium) | Creates controlled plastic deformation for a secure lock. |
| Fine/Decorative (Watch Knobs) | Diamond (Type AC/AD) | 160 DP or finer | Use Cut Knurling for a sharp, precise, and aesthetic finish. |
The Engineer’s Guide: How to Perfectly Callout Knurling on a Drawing
This is where the rubber meets the road. An ambiguous drawing is the root cause of manufacturing failures. As Alex Krulikowski, a former member of the ASME Y14.5 committee, has emphasized, the fundamental purpose of any drawing specification is to communicate functional requirements clearly. Ambiguity is the enemy.
Your drawing is your primary communication tool. A vague note like “KNURL” with an arrow is a gamble. A professional callout is a precise instruction.
Good vs. Bad: A Visual Example
- Bad Callout: A simple leader line pointing to the surface with the text “KNURL.” This is a recipe for disaster. It tells the machinist nothing about the pitch, type, or final inspection diameter.
- Good Callout (per ASME Y14.5): A feature control box that looks something like this:
96 DP TYPE AC RAISED ⌀.755 MIN
Let’s break down exactly what this tells the manufacturer:
96 DP(Pitch): This specifies a Diametral Pitch of 96 (96 teeth per inch of diameter). This is the most common standard in the US.TYPE AC(Type): This specifies a raised diamond-pattern knurl, which is the standard result of form knurling.⌀.755 MIN(Diameter): This is the final, non-negotiable inspection requirement. It states that the knurled diameter, when measured over the teeth, must be at least 0.755 inches.
The Most Critical Formula Your Textbook Skipped
Here is the single most important secret for successful form knurling (Type AC): you, the designer, must also calculate and specify the pre-knurl blank diameter.
Why? Form knurling is a displacement process. To get a clean, sharp pattern without “double-tracking,” the tool must be able to form a perfect, integer (whole) number of teeth (N) around the circumference.
The formula to ensure this is: Dblank = N / DP
Here’s how to use it:
- You know your desired DP (e.g., 96).
- You know your nominal diameter (e.g., 0.750″).
- Calculate N: N=0.750×96=72. This is a perfect integer.
- Therefore, your Dblank (the “Before-Knurl Diameter”) must be exactly 0.750″. You should add a tight tolerance to this on your drawing (e.g., ±0.0005″).
This isn’t just our opinion; it’s a fundamental of machining. As the editors of the Machinery’s Handbook state, “Failure to control this pre-knurl diameter is the most common cause of knurling failures, such as flaking and ‘double-tracking’.”
Your Pre-Flight Checklist for Knurling Callouts
Before you sign off on that drawing, run through this list:
- Process Chosen? (Form vs. Cut)
- Pattern Chosen? (Straight for press-fit, Diamond for grip)
- Pitch Specified? (e.g., 96 DP)
- Type Specified? (e.g., Type AC or Type AD)
- Final OD Specified? (e.g., ⌀.755 MIN)
- (Crucial!) If using Form Knurling, did you calculate and specify the pre-knurl blank diameter with a tight tolerance?
- Relief Grooves? Did you add undercuts to protect adjacent, precision surfaces from material flow?
DFM for Knurling: A Failure Analysis Guide
Even with a perfect callout, you might get samples back that just don’t look right. When this happens, it’s almost always a Design for Manufacturability (DFM) issue that could have been caught at the design stage.
Here is a simple failure analysis catalog for the three most common knurling defects and how to fix them on your drawing.
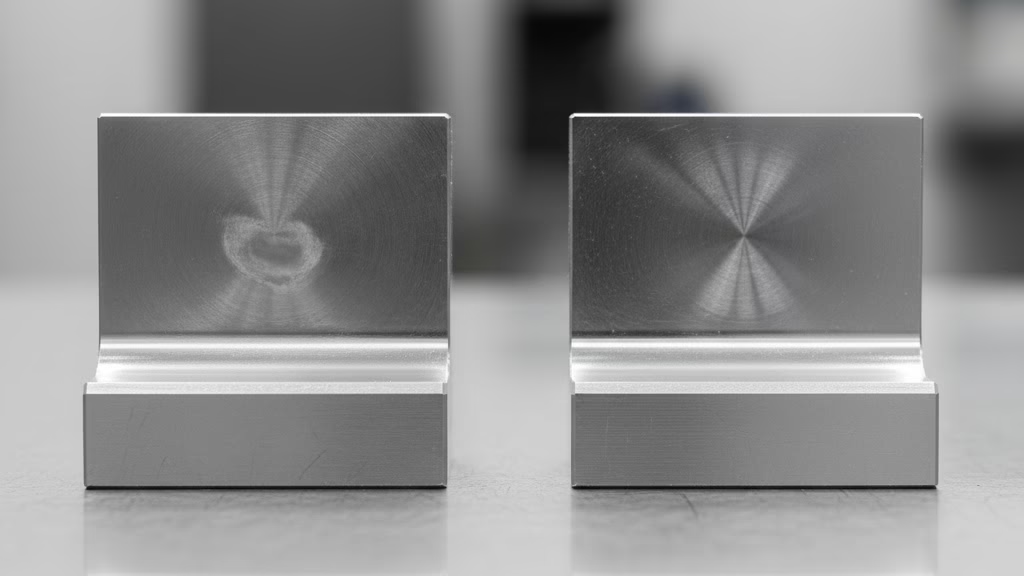
Failure #1: “Double-Tracking” or Chaotic Teeth
- What it looks like: A messy, chaotic pattern where the teeth look like they’ve been stamped over each other. The pattern isn’t clean or sharp.
- The Root Cause: This is the classic symptom of an incorrect blank diameter (Dblank) in a form knurling process. The tool couldn’t create an integer number of teeth, so it “slipped” and created a second, overlapping pattern.
- The Design Solution: Go back to your design. Re-calculate your Dblank=N/DP formula. You must specify that pre-knurl diameter and hold it to a tight tolerance. This single change will solve the problem 99% of the time.
Failure #2: “Flaking” or Chipped Teeth
- What it looks like: The knurl surface is peeling, flaking, or looks chipped, as if the material was too brittle.
- The Root Cause: The material was too hard for the process. This almost always happens when form knurling is attempted on a tough material like stainless steel or any alloy harder than 35 HRC. The process isn’t displacing the material; it’s breaking it.
- The Design Solution: This is a simple fix. Change the drawing to specify a Cut Knurl (Type AD). The cutting process will have no problem creating a clean pattern on a hard material.
Failure #3: Part Deformation or Distortion
- What it looks like: The part itself is compromised. A tube is now oval-shaped, or a thin shaft is bent.
- The Root Cause: Immense radial pressure from form knurling was applied to a part that couldn’t withstand it—specifically, a thin-walled part (like our client’s 0.75mm tube).
- The Design Solution: Just like the flaking failure, the fix is to change the process. Specify Cut Knurling. It imparts almost zero radial stress, protecting the part’s geometry. As a rule of thumb, if your wall thickness is less than 2mm, you should default to cut knurling from the start.
Stop Designing Features, Start Designing a Process

At the end of the day, successful knurling design isn’t about copying a standard from a textbook. It’s about designing a complete and robust manufacturing strategy—a holistic plan that connects your chosen material, your required function, and the right manufacturing process.
Your responsibility as an engineer isn’t just to “design a feature.” It’s to use your Design for Manufacturability (DFM) knowledge to deliver a “zero-ambiguity, 100% manufacturable” drawing to your supplier.
Don’t gamble on expensive prototypes or risk your project timeline on a part that can’t be made. If you aren’t 100% confident in your knurling strategy—especially for tough materials like stainless steel or on complex, thin-walled parts—get an expert opinion before you commit to metal.
Take the guesswork out of your design.
If you have a design in mind, let’s make sure it’s perfect before production. Upload your drawing today, and our application engineers will provide you with a free, no-obligation DFM analysis. We’ll help you review your knurling types, applications, and best practices to ensure your part is a 100% success from the very first run.
Ready to Turn Your Design into Reality?
You’ve mastered the DfM. Now, partner with a team that can execute it. At Zenithin, we turn complex drawings into precision parts every day.
References & Notes
[1] ASME Y14.5: Refers to the American Society of Mechanical Engineers standard for Dimensioning and Tolerancing. This standard is the authoritative guideline for engineering drawings, ensuring all geometric characteristics are clearly defined.
[2] Diametral Pitch (DP): A standard (imperial) system for specifying knurl coarseness. It is the ratio of the total number of teeth on the circumference to the diameter. A higher DP number (e.g., 160 DP) results in a finer knurl, while a lower number (e.g., 96 DP) results in a coarser knurl.
[3] Machinery’s Handbook: An authoritative reference book for mechanical engineers, designers, and machinists, published by Industrial Press. The citation refers to its comprehensive section on knurls and knurling, which details the critical relationship between blank diameter and pitch.
