
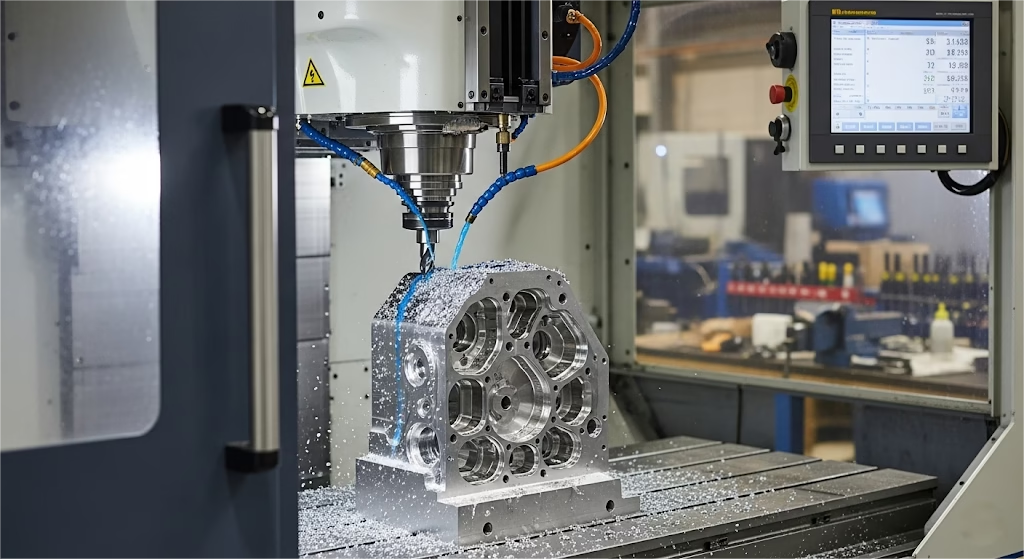
Tired of watching CNC machining quotes blow up your project budget? This guide delivers a proven DfM framework for your tolerance drawings. It’s a key part of a broader strategy for slashing CNC machining costs, leading directly to predictable budgets and profitable, on-time projects.
Costly tolerance drawing mistakes for manufacturing include applying unnecessary tight tolerances that can double production costs, designing sharp internal corners that require expensive secondary EDM operations, and creating deep, narrow pockets which dramatically increase machining time and risk of tool failure.
But here’s the thing: spotting these errors is only half the battle.
Read on to discover the simple decision-making matrix that top project leads use to move beyond just fixing mistakes, and start making strategic choices that build cost-efficiency directly into your designs.
Quick Reference: Cost Impact of Common DfM Mistakes
| DfM Mistake | Why It’s Expensive | The Economical Fix | Estimated Cost Impact |
|---|---|---|---|
| Sharp Internal Corners | Requires secondary process (EDM). | Add internal radius >1mm. | High (10x+ feature cost) |
| Deep, Narrow Pockets | Causes tool vibration & breakage. | Widen pocket or use through-slots. | Significant (+50-150% cost) |
| Unnecessary Tolerances | Needs extra finishing & inspection. | Use only on critical features. | Very High (2x-3x total part cost) |
| Overly Thin Walls | Causes part vibration & warping. | Follow min. thickness rules. | Moderate (+25-50% cost) |
Section 1: Identifying The Root of Unnecessary Costs
Which Common Drawing Mistakes Drive Up Machining Prices?
Certain design features, while looking perfectly fine in a CAD model, are notorious for creating disproportionate costs on the machine shop floor, often stemming from the key machining cost drivers of material, time, and tolerance.
Here’s a concise guide to spotting these “cost traps” during your design reviews.
1. Sharp Internal Corners
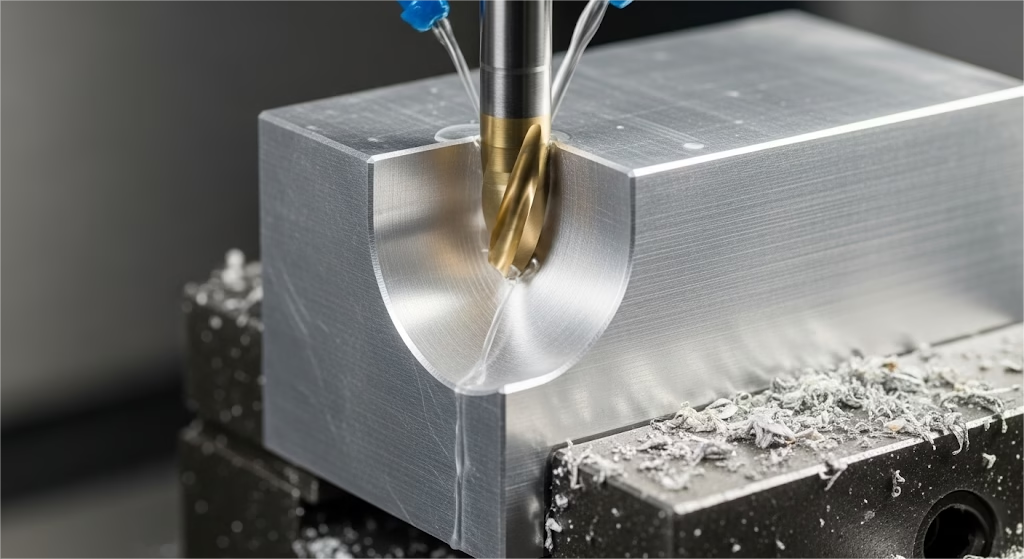
- The Issue: Standard CNC milling uses round cutting tools (end mills), which cannot create a perfect 90-degree internal corner. Achieving this requires a secondary, much more expensive process like EDM (Electrical Discharge Machining), potentially increasing that feature’s cost tenfold.
- The Fix: Always design with an internal radius. A radius of at least 1mm (0.04″) is a good starting point. This simple change keeps your part on a standard, cost-effective milling machine.
Need to Machine Sharp Internal Corners?
Our Precision Wire Cutting (EDM) services are the ideal solution for features that can’t be achieved with standard milling.
2. Deep, Narrow Pockets
- The Issue: The stability of a cutting tool plummets as its length-to-diameter ratio increases. When this ratio exceeds 3:1, machinists must slow down dramatically to avoid tool vibration and breakage. A ratio over 5:1 can easily increase costs by 50-150%.
- The Fix: Design pockets to be wider and shallower whenever possible. If a deep feature is essential, consider if it can be designed as a through-slot instead of a blind pocket to improve tool access and chip removal.
3. Overly Thin Walls
- The Issue: Thin walls vibrate and warp under the pressure of a cutting tool, which presents a significant challenge in balancing strength, precision, and machinability. For aluminum, walls thinner than 0.8mm (0.03″) become problematic and require slower, more careful machining, driving up time and cost.
- The Fix: Stick to recommended minimum wall thicknesses for your chosen material. If a thin wall is unavoidable, discuss adding temporary support ribs with your manufacturing partner.
4. Unnecessary Tight Tolerances
- The Issue: This is the single biggest source of hidden costs. The relationship between tolerance and cost is exponential; tightening a standard tolerance from ±0.125mm (±0.005″) to ±0.025mm (±0.001″) can easily double the part cost, as can incorrectly specifying a common feature, which is covered in this knurling DfM guide.
As GD&T expert Don Day often emphasizes, tolerances must be driven by function. If a tight tolerance doesn’t have a clear purpose, it only serves to increase your budget.
- The Fix: Apply tight tolerances only where they are functionally critical. This requires a systematic method for applying functional tolerances, a decision that often involves choosing between advanced hole-finishing processes like reaming vs. boring for bearing bores.
For all non-critical features, use a standard tolerance block like ISO 2768-m. We once saw a client’s project where a non-functional, overly-tight tolerance on a plastic snap-fit feature led to a 30% assembly failure rate because the parts were too rigid and brittle. A looser, more functional tolerance would have been both cheaper and more effective.
Section 2: Making Smart Trade-Offs
How Do You Decide Which Tolerances Are Worth the Extra Cost?

Spotting mistakes is the first step. The next, more critical step is making intelligent trade-offs.
As a project lead, your job isn’t to eliminate all costs, but to eliminate unnecessary costs. To do this, you need a simple, powerful framework for deciding where to invest in precision and where to save.
You can use a “Cost-Function Matrix” to guide these decisions. It’s a tool for quickly categorizing any feature on your drawing, helping you and your team decide where to focus your optimization efforts. Simply evaluate each feature on two axes: its Functional Importance and its Manufacturing Cost.
This creates four clear strategic zones:
High Importance / High Cost (The “Necessary Investment” Zone):
These are critical features like bearing bores or high-pressure sealing surfaces, which often require specific precision hole-making processes to achieve their required function.
They are expensive for a good reason. Your strategy is to invest wisely and validate that the cost is justified.
Low Importance / High Cost (The “Budget Killer” Zone):
This is where you find the most savings. It’s the tight tolerance on a non-mating surface or the beautiful—but often unnecessary—finish on an internal part.
Understanding when to choose functional surface coatings like anodizing over a simple cosmetic finish is key to eliminating these costs.
Low Importance / Low Cost (The “Leave It Alone” Zone):
These are non-critical features correctly specified with standard, economical tolerances. Your strategy is to protect and standardize, preventing “tolerance creep.”
High Importance / Low Cost (The “Genius” Zone):
This is where clever design achieves a critical function in an inexpensive way. Your strategy is to champion and replicate these solutions to build a culture of DfM excellence.
Section 3: A More Strategic Approach
How Can You Prevent These Problems Before You Even Draw?
The biggest cost-saving opportunities, such as those detailed in this guide to preventing heat treatment distortion, are often determined long before you apply the first tolerance.
By asking the right strategic questions at the very beginning of a project, you can steer your team away from entire categories of manufacturing complexity, such as the challenges of heat treatment.
First, determine your true manufacturing goal. Are you designing for a one-off prototype or for mass production? The answer dictates your entire approach.
- Prototyping shops are built for speed and can handle almost any complexity, but at a high cost.
- Production shops are built for efficiency at scale and demand simplicity. A design optimized for one is often terrible for the other.
Your Strategy: Design for your end goal. If your aim is cost-effective production, you must adopt the mindset of a production shop from day one. A small upfront investment in a DfM review with a production partner can save you a fortune later.
Second, learn to look beyond the quoted price to find a true partner. The lowest quote can often hide the highest total cost in terms of your time, schedule delays, and quality issues.
Your Strategy: Vet for partners, not just suppliers. When you send out an RFQ, a true partner will not just quote the price; they will proactively flag potential issues and suggest optimizations.
For example, they might say, “We noticed if you can change this internal radius from 0.5mm to 2mm, we can use a more efficient tool and reduce your cost by 15%.” This kind of feedback is invaluable and a clear sign that you’ve found a partner who will help you lower your Total Cost of Ownership, not just your initial price.
Section 4: Putting It All into Action
How Can You Make DfM a Consistent Habit for Your Team?
Knowledge is only powerful when it’s applied consistently. To transform these ideas from a one-time lesson into a team-wide habit, you need to embed them into your daily workflow. The goal is to shift your team from reactively fixing problems to proactively preventing them, starting with avoiding common file errors.
A simple yet effective way to do this is with a Three-Stage DfM Review Process, integrated directly into your project’s design gate reviews.
-
- The Concept Review: During the earliest conceptual design phase. Your focus is on Subtraction & Simplification. Ask fundamental questions: “Can this part be eliminated entirely? Can we use an off-the-shelf component instead?”
- The Detailed Design Review: As the CAD model is being finalized. Your focus is on Optimization & Standardization. Use the Visual Cost Traps checklist and the Cost-Function Matrix as your guide. Make it a team exercise to identify and eliminate any features in the “Budget Killer” quadrant.
- The Pre-Release Review: Just before the design is frozen and sent for quoting. Your focus is on Validation & Partnership. Share a preliminary design with your trusted manufacturing partner and ask them one simple question: “How would you change this design to make it cheaper or faster to produce?” The feedback you receive at this stage is pure gold.
We once had a client who needed a prototype in three days, but their design required a five-day lead time. A quick discussion allowed us to suggest a minor, temporary design change that enabled us to deliver the part in 48 hours, saving their trade show presentation. That is the power of proactive partnership.
Conclusion: Turn Your Next Drawing into a Financial Asset
You now have a clear, actionable playbook. You can spot costly features, use a framework to make smart trade-offs, and implement a process to ensure consistency.
A well-executed <strong>tolerance drawing for manufacturing</strong> is more than just a technical document—it’s a financial tool that protects your budget and timeline, especially when it includes all the critical 2D drawing information from the start.
What’s the Next Question You Should Be Asking?
After mastering DfM for CNC machining, you’ll likely wonder how these principles apply to other processes like injection molding or 3D printing.
While the core philosophy of balancing cost and function remains, the specific rules change entirely. This reinforces the value of having a manufacturing partner with deep, multi-process expertise who can guide you on the best method for your specific project.
Take the Guesswork Out of Your Next Design
Don’t leave your next project’s budget to chance. Put these principles into action today.
Upload your design, and our team of application engineers will provide you with a free, confidential manufacturability analysis. We’ll help you identify potential cost drivers and suggest actionable optimizations, giving you the confidence that your design is ready for efficient and cost-effective manufacturing.


